Organic Seed Starting Guide 2026: What Actually Works (Bootstrap Farmer Method)
An honest guide to starting seeds for a container or small-space garden—covering trays, heat mats, light, timing, and why Bootstrap Farmer's trays are standard.

Our Top Picks
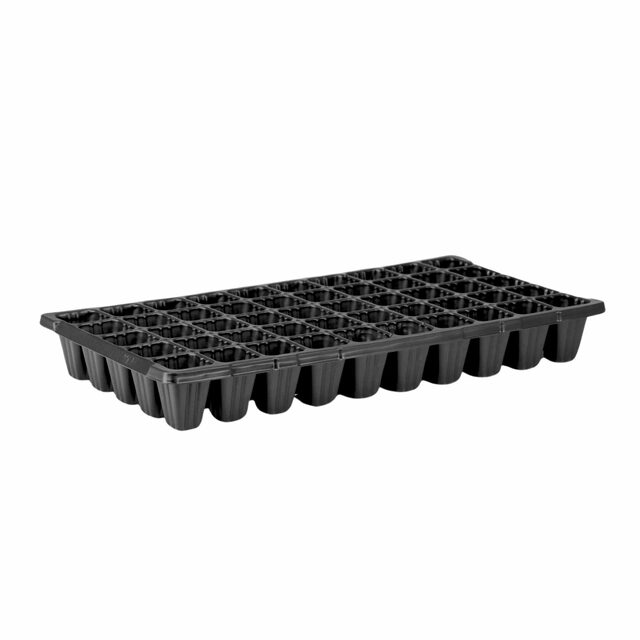
Bootstrap Farmer 50-Cell Seed Starting Tray (5-pack)
Thick-wall 1020 trays that survive 3–4 seasons without cracking or bowing. The 50-cell format gives cells deep enough for good root development before transplanting. Far thicker than the flimsy single-use trays sold at hardware stores. Comes with matching bottom tray for bottom-watering.
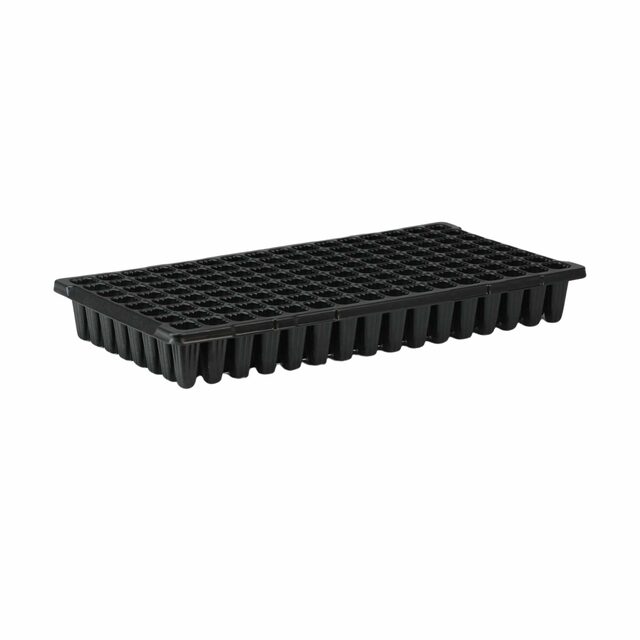
Bootstrap Farmer 128-Cell Plug Tray (5-pack)
For starting large batches of herbs, flowers, and greens where fine cell size is acceptable. The 128-cell format fits 3× more starts in the same tray footprint. Better for cut flowers, herb starts, and small-seeded crops (lettuce, basil). Bootstrap Farmer's thicker material quality holds here too.
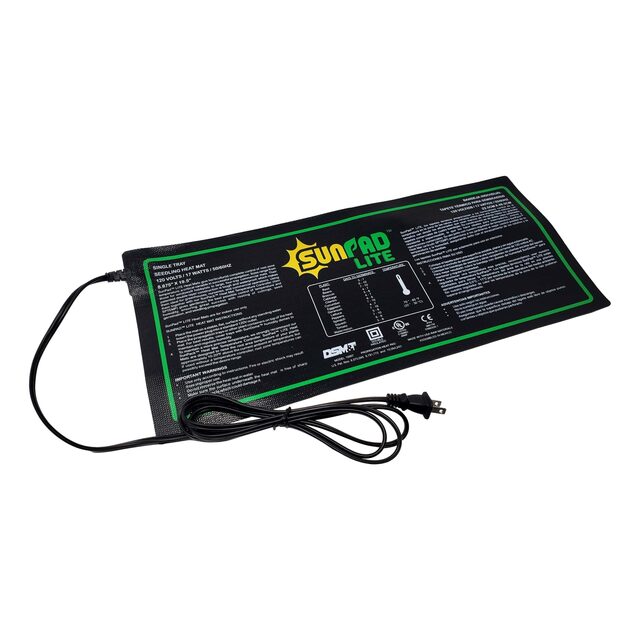
Bootstrap Farmer Seedling Heat Mat (20×20)
Raises soil temperature 10–20°F above ambient. Waterproof, wipe-clean surface. The 20×20 size fits one 1020 tray exactly — no overhang, no wasted heat. Tomato and pepper germination rate goes from 40–60% at room temperature to 80–95% with consistent soil warmth. Worth it.
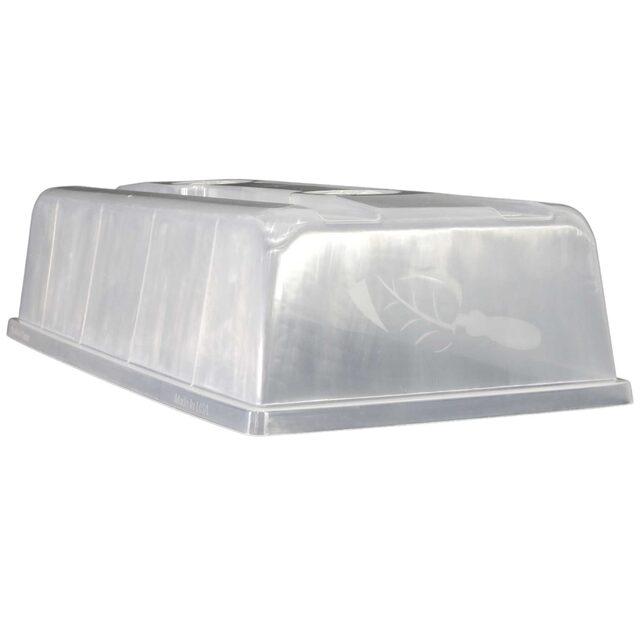
Bootstrap Farmer Humidity Dome (Standard Height)
Clear dome maintains 70–80% humidity above germinating seeds without creating the fog-out of cheaper domes. Vents on top for humidity adjustment. Remove when seedlings reach dome height — keeping it on after germination promotes damping off. A necessary part of the system, not an optional accessory.
This post may contain affiliate links. If you make a purchase through these links, we may earn a small commission at no extra cost to you. Learn more.
Starting your own seeds sounds complicated until you understand the four things that actually determine success: warmth, moisture consistency, light, and airflow at the right times. Everything else is gear that helps you hit those four targets more reliably.
This guide walks through seed starting specifically for apartment and small-space gardeners — focused on the crops that make container gardening worthwhile (tomatoes, peppers, herbs), the equipment that’s worth the money, and the mistakes that kill more starts than anything else.
Why Bother Starting From Seed?
Three reasons worth considering:
Variety access. A good local nursery carries 8–12 tomato varieties. Bootstrap Farmer’s seed catalog links to hundreds — including container-specific varieties, paste types for small-batch sauce, and heirloom varieties with flavor profiles that bear no resemblance to commercial tomatoes.
Cost. A packet of 25 tomato seeds costs $3–4 and produces far more seedlings than you’ll use. A transplant at a nursery costs $4–6 per plant. For a 10-container garden, the economics are clear.
Timing control. In most climates, the window for buying good tomato transplants at nurseries is 2–3 weeks in May. If you miss it, you’re stuck with overgrown root-bound plants that never fully recover. Starting your own extends that window by 6–8 weeks.
The Equipment That’s Worth It
Trays: Bootstrap Farmer, Nothing Else
There are two types of seed starting trays: the thin ones that cost $2 and crack when you pick them up wet, and the thick ones that last for years. After one season of using the cheap kind, most gardeners switch permanently.
Bootstrap Farmer’s 50-cell trays are the standard for a reason. The cell depth is correct for developing genuine root systems before transplanting. The wall thickness means they can be lifted when wet without bowing and releasing soil plugs onto the floor. They’re reusable for 3–4 seasons with basic care (wash with mild soap after each use; don’t leave them UV-exposed when empty).
For a balcony or apartment garden, two or three 1020 trays are sufficient. A 50-cell tray produces 50 seedlings — more than enough for a typical balcony garden with room for gifts.
For smaller-seeded crops (basil, lettuce, flowers), the 128-cell tray gives better density. The shallower cells are appropriate for these crops, which germinate and establish quickly.
Heat Mat: Shorter Germination Times, Higher Germination Rates
Seed germination is primarily driven by soil temperature. Most warm-season crops (tomatoes, peppers, basil, melons) germinate optimally at 75–85°F soil temperature. A cool apartment in early spring may have ambient temperatures of 65–68°F — at this temperature, tomato germination rate drops to 60–70% and takes 10–14 days.
A heat mat raises soil temperature 10–20°F above ambient. At 78–80°F soil temperature:
- Tomato germination: 5–7 days, 85–90% germination rate
- Pepper germination: 7–10 days, 80–85% germination rate (peppers are the slowest; cool soil is their main limiting factor)
- Basil germination: 5–7 days, 90%+ germination rate
The Bootstrap Farmer heat mat is sized exactly for one 1020 tray. This detail matters — mats that are slightly too large or too small distribute heat unevenly. Use it only during germination; once seeds have sprouted, move trays off the mat (constant heat after germination promotes root issues and legginess).
Humidity Dome: Required for Germination, Remove After
The dome holds moisture around germinating seeds, preventing the surface dry-out that kills emerging seedlings before they establish. It also concentrates warmth from the heat mat.
Critical rule: remove the dome as soon as seedlings emerge. Leaving it on past germination creates stagnant, humid air that is exactly the environment damping off fungus needs. If you start several trays and they germinate at different times, remove the dome from each tray individually as its seedlings emerge.
Light: Windows vs. Grow Lights
For most apartments:
South-facing window with direct sun 5–6 hours: sufficient for most seed starting if you start within 4 weeks of transplant date. Move seedlings within 2–3 inches of the glass.
East or west window with 3–4 hours direct sun: supplemental lighting needed for tomatoes and peppers. A single 2-foot T5 fluorescent or LED grow strip hung 2–4 inches above trays bridges the gap for about $30–50.
North-facing window or minimal light: proper grow lights are needed for fruiting crops. For herbs and greens, a single grow strip is sufficient.
What you don’t need: A 600W LED quantum board, a grow tent, a photosynthetically active radiation (PAR) meter. These tools help market farmers producing year-round. For a balcony gardener starting seeds in spring, a simple $30 LED strip is the complete solution.
The Seed Starting Process, Step by Step
Timing
Calculate backwards from your last frost date. Find yours at the USDA Plant Hardiness Zone Map or a local extension service site.
| Crop | Weeks Before Last Frost |
|---|---|
| Peppers | 10–12 weeks |
| Tomatoes | 6–8 weeks |
| Basil | 4–6 weeks |
| Squash, cucumbers, melons | 3–4 weeks |
| Herbs (parsley, cilantro) | 4–6 weeks |
| Kale, chard | 4–6 weeks |
Starting too early is as problematic as too late. Tomatoes that have been growing under lights for 10 weeks are large, root-bound, and stressed. They often perform worse after transplant than a 6-week seedling in its prime.
Filling and Seeding
- Fill cells to the rim with moistened seed starting mix. The mix should be damp — squeeze a handful and it holds a shape but releases no water. Dry mix won’t wick; soaking-wet mix causes rot.
- Make a small depression in each cell — the seed packet’s recommended depth, typically 2–3x the seed diameter.
- Sow 2 seeds per cell. You’ll thin to one seedling per cell after germination — don’t skip this step, as two plants in one cell compete and both underperform.
- Cover with a thin layer of dry mix.
- Label the tray immediately.
Bottom-Watering: The Key Technique
Top-watering seeds (pouring or spraying from above) is the leading cause of damping off. The water hits the soil surface and keeps the stem base chronically wet — exactly where fungal pathogens attack.
Bottom-watering: set the filled tray inside a waterproof bottom tray with 1/2 inch of water. The seed starting mix wicks moisture upward. The soil surface stays relatively dry. Stem bases stay dry. Damping off risk drops dramatically.
Check the water level daily; refill when the bottom tray is empty.
Germination to Transplant
After germination:
- Remove the humidity dome immediately.
- If using a heat mat, turn it off or move trays off it.
- Provide light: move to the brightest window or position grow lights 2–4 inches above seedlings.
- Begin light fertilization at 2 weeks post-germination: diluted fish emulsion or seaweed extract at 1/4 strength. Seed starting mix is nutrient-poor by design; seedlings need supplemental feeding by their third week.
- Thin to one seedling per cell at the first true leaf stage (the first leaves after the rounded seed leaves). Use scissors to snip, not pull — pulling disturbs the roots of the surviving seedling.
- Begin hardening off 1 week before transplant date: bring trays outside for increasing periods over 7 days, starting with 1–2 hours in shade and working up to full outdoor conditions. This is non-optional — seedlings grown under lights or indoors are physiologically different from outdoor-hardened plants and will sunscald or wilt-check without gradual acclimation.
If you’re transplanting into in-ground beds, the single best pre-season prep is to build healthy soil for your seedlings through spring composting — applied a few weeks before transplant day so the biology has time to activate.
Organic Seed Sources
Bootstrap Farmer’s catalog focuses on production-performance varieties used by market farmers. For variety selection guidance specific to container growing, their website includes notes on container suitability.
Other sources worth bookmarking for organic seed:
- Fedco Seeds (cooperative, excellent variety notes)
- High Mowing Organic Seeds (100% USDA-certified organic)
- Johnny’s Selected Seeds (detailed performance data)
- Territorial Seed (strong West Coast adaptation focus)
For the broader garden setup, see the Complete Apartment Garden Guide (2026). Heading outdoors this spring? Our sustainable sneakers guide covers eco-certified footwear built for garden work and trail time alike.