
Our Top Picks at a Glance
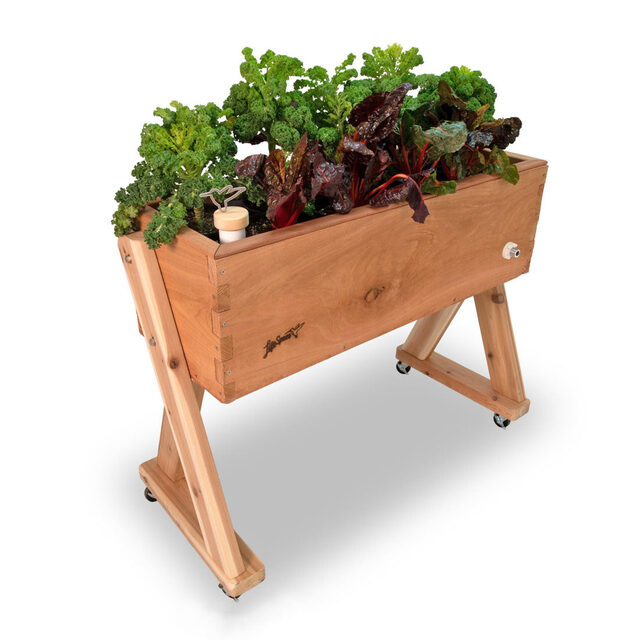
Eartheasy GrowBox Self-Watering Planter (15-gal)
Sub-irrigation reservoir handles 3–5 days of watering automatically. The wicking mat draws moisture from below, which means consistent soil moisture without waterlogging. Ideal for tomatoes, peppers, and herbs on a balcony. Made from recycled polypropylene. No drainage holes in the reservoir means no staining balcony surfaces.
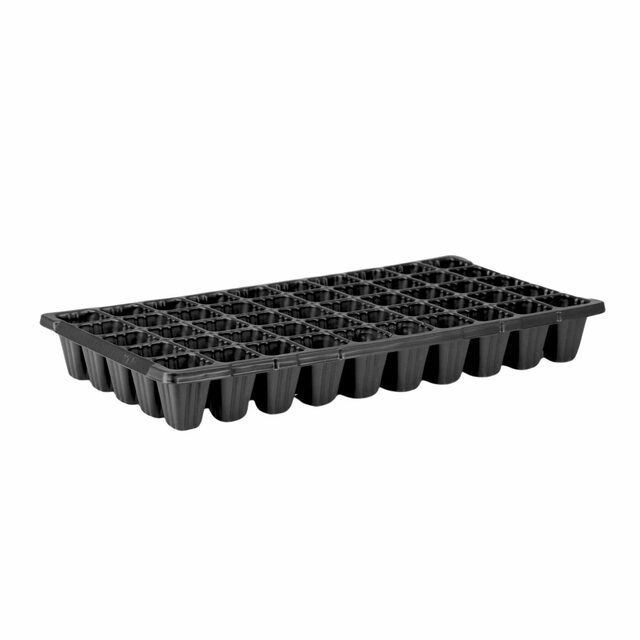
Bootstrap Farmer 50-Cell Seed Starting Tray (5-pack)
Thick 1020 trays that flex without cracking after 3–4 seasons. The 50-cell size is the right balance between cell depth (roots don't spiral) and fitting a standard heat mat. Bootstrap Farmer's trays have thicker walls than the thin-sheet competition — they don't buckle when wet.
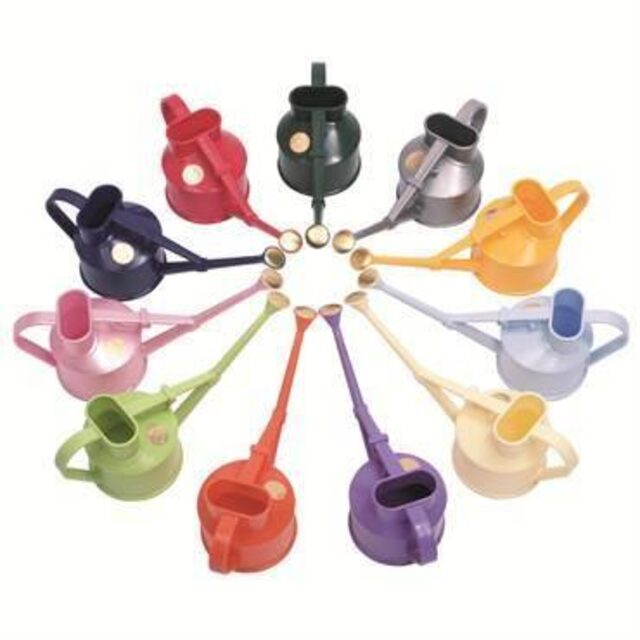
EarthHero Haws Watering Can 1.3L
British-made since 1886. The long spout gives precise water placement — critical for seedlings where a flood-pour will wash seeds out of cells. The balance when full is genuinely better than cheap plastic cans. Galvanized steel construction; will outlast any plastic can.
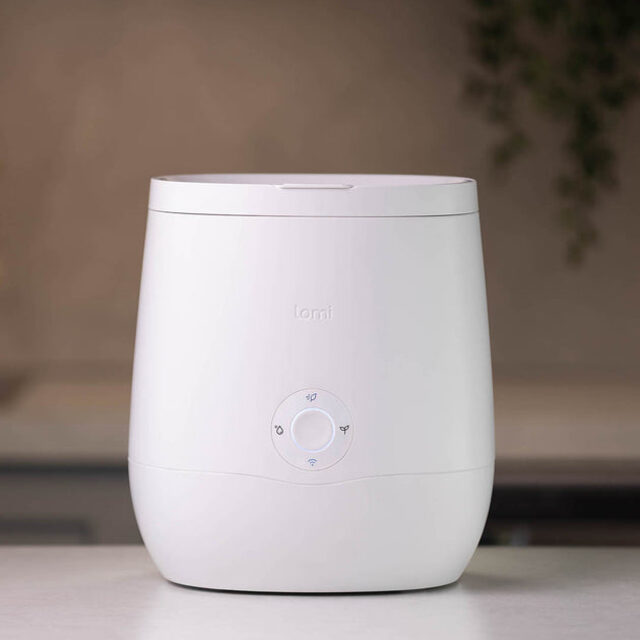
Lomi Classic Electric Composter
Converts food scraps to compost in 4 hours. Genuinely apartment-friendly: no smell when the lid is closed, fits on a countertop, cycles automatically. The output is soil amendment-grade, not finished compost, but it's excellent mixed into potting soil or top-dressed into containers. Works on all organic matter including meat and dairy (unusual for countertop composters).
Eartheasy Compost Tea Brewer Kit
Aerates compost or worm castings in water to create a microorganism-rich liquid fertilizer. Outstanding for container gardens where soil biology otherwise depletes quickly. Use weekly on fruiting plants — results are visible within two to three weeks. Eartheasy's kit includes the brewer bag, pump, and tubing.
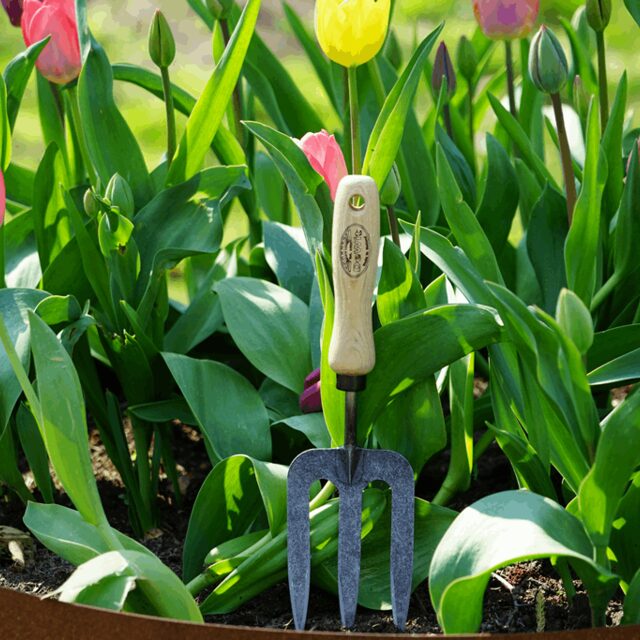
EarthHero Tierra Garden DeWit Hand Fork
Forged boron steel tines, ash wood handle. The balance is immediately noticeable compared to hardware-store tools — the weight sits in your palm, not at the tip. Fits container-scale work perfectly. DeWit tools are made in the Netherlands to a standard that means buying once.
This post may contain affiliate links. If you make a purchase through these links, we may earn a small commission at no extra cost to you. Learn more.
I grew my first tomatoes in a 5-gallon bucket on a 40-square-foot balcony in Chicago. The bucket sat on a $4 plant saucer, the tomato cage was bent wire from a dollar store, and I used potting mix from a leftover bag I found in the storage unit. The tomatoes were terrible. Small, mealy, mostly cracked. But I ate them and they were the best tomatoes I’d ever tasted, because I grew them.
That was twelve years ago. Since then I’ve grown food on apartment balconies in three cities, in a 200-square-foot studio with a single south-facing window, and eventually in a real backyard. The backyard is easier in some ways. But apartment gardening taught me more about what plants actually need — because when space is constrained, you can’t hide your mistakes behind more plants.
This guide is everything I’ve learned compressed into a single resource. Beginner-friendly but not dumbed down. Focused on the eco-efficient approach: grow more with less — less water, less plastic, less wasted effort.
Why Small-Space Gardening in 2026 Is Easier Than Ever
Three things have changed in the last five years that genuinely make apartment gardening more viable:
Self-watering containers have become good. The old self-watering planters from big-box stores were thin plastic that cracked in one season and had wicking designs that rotted roots. The current generation — from Eartheasy’s GrowBox to Lechuza’s planters — uses sub-irrigation reservoirs with proper wicking mats. You can leave a 15-gallon self-watering planter for 5 days without handwatering in most climates. For a balcony garden, this changes the calculus entirely.
Indoor composting is actually solved. The Bokashi system has existed for 30 years, but Lomi and similar electric countertop composters made the concept mainstream and removed the “what do I do with the pre-compost” problem that stopped renters from adopting Bokashi. You can now close the loop on kitchen scraps without a backyard, a worm bin, or a municipal compost pickup.
Seed companies have started focusing on container-specific varieties. Bootstrap Farmer, Johnny’s Selected Seeds, and Territorial all now offer container-specific variety selection guidance. The ‘Tumbling Tom’ tomato, ‘Bush Pickle’ cucumber, ‘Patio Choice Yellow’ cherry tomato — these are bred or selected for exactly the growing conditions you have.
Chapter 1: Your Container Garden Foundation
Choose the Right Container Size
The single most common apartment-garden mistake is planting in containers that are too small. The 8-inch pot that looked fine at the nursery will be root-bound by July and producing nothing by August.
Rules of thumb by crop:
| Crop | Minimum Container | Recommended |
|---|---|---|
| Herbs (basil, cilantro, parsley) | 6-inch pot | 8–10 inch pot or window box |
| Lettuce, spinach, arugula | 8-inch, 4 inches deep | 12-inch wide window box |
| Radishes, beets | 8 inches deep | 12 inches deep |
| Kale, chard | 12 inches | 3-gallon container |
| Peppers | 12 inches, 3-gal | 5-gallon container |
| Bush tomatoes | 12–14 inches | 5-gallon container |
| Indeterminate tomatoes | 18 inches minimum | 15–20 gallon container |
| Zucchini, squash | 18 inches | 10+ gallon container |
| Cucumbers | 12 inches | 5-gallon container + trellis |
Sub-Irrigation vs. Traditional Drainage
Traditional containers have drainage holes. Water goes in the top, excess drains from the bottom. This means:
- You need a saucer (or you stain your balcony)
- You need to water more frequently because the soil dries from the top
- Nutrients leach out with each watering
Self-watering containers (also called sub-irrigated planters or SIPs) work the opposite way. A reservoir at the bottom holds water; a wicking medium draws it up as the soil above dries. Benefits:
- 30–50% less water use
- More consistent soil moisture = fewer blossom drop events on tomatoes/peppers
- No drainage on balcony surface
- Can go 3–7 days between refills depending on weather
The Eartheasy GrowBox is the benchmark for balcony-scale self-watering planters. The 15-gallon size is the sweet spot: big enough for a single indeterminate tomato plant, small enough to move before a high-wind storm warning.
Potting Mix: What’s Actually in the Bag
Don’t use garden soil in containers. Ever. It compacts into a brick, drains poorly, and suffocates roots. Standard potting mix is fine, but for eco-aligned growing, look for:
- Peat-free mixes: Peat extraction destroys carbon-sink bogs. UK-grown brands have been ahead on this; US brands are improving. Look for mixes using coir (coconut fiber), pine bark, or compost as the base.
- Compost content: A mix with 25–30% finished compost feeds plants for the first 4–6 weeks without added fertilizer.
- No added moisture crystals: Acrylamide polymer crystals in some mixes have raised environmental and crop contamination questions. Skip.
Good peat-free alternatives: FoxFarm Ocean Forest (contains bat guano + sea-going fish compost), Happy Frog, or any blend you make yourself from coir + perlite + finished compost (roughly 40/30/30 by volume).
Chapter 2: Starting Seeds — The Apartment Way
Most apartment gardeners start with transplants from nurseries. This is fine. But growing from seed unlocks:
- Varieties unavailable as transplants (most specialty tomatoes, every interesting pepper)
- Significant cost savings (seeds vs. transplants = 10x fewer dollars)
- Earlier start dates that maximize your growing season
- The satisfaction of genuinely starting from nothing
What You Need (Not What the Internet Says You Need)
The internet will tell you to buy a grow tent, a 600W LED quantum board, a pH meter, EC meter, rockwool cubes, automated drip system, and a germination chamber. You need:
- A 1020 tray with cells and a humidity dome — 50-cell trays from Bootstrap Farmer are the standard. Their thick-wall construction survives multiple seasons.
- A heat mat — most seeds germinate at soil temperatures of 70–85°F. In a cool apartment, a simple heat mat under your trays shortens germination from 10–14 days to 5–7 days.
- A light source — a south or southwest window works for most crops. If you have less than that, a single T5 fluorescent or LED strip 2–4 inches above seedlings covers the gap. You do not need expensive grow lights for starting seeds (though they help for growing plants to maturity indoors).
- Seed starting mix — not potting mix. Seed starting mix is fine-textured and sterile, preventing damping off.
- Labels and a permanent marker — obvious, but you will forget what’s in which cell by day 4.
The Bootstrap Farmer System
Bootstrap Farmer has built a following in the small-farm and market gardening world for a reason: their trays work. The standard 1020 bottom tray + 50-cell insert + clear dome system gives you:
- Cell volume deep enough to develop a good root ball before transplanting
- A bottom tray that holds water for bottom-watering (critical — top-watering seeds leads to damping off)
- A dome that maintains 70–80% humidity without fogging so thick you can’t see germination
Bottom-watering method: Fill the bottom tray with 1/2 inch of water. The seed starting mix wicks moisture up from below. Top of the mix stays dry, which means the stems at soil level don’t stay wet — damping off requires surface moisture.
When to Start
The general rule: count back from your last frost date. For most crops, start 6–8 weeks before last frost for tomatoes and peppers; 4 weeks for squash, cucumbers, and melons; 2–3 weeks for basil.
For apartment gardens in USDA zones 9–11 (most of coastal CA, South FL, Gulf Coast), you’re starting much earlier — or year-round for cool-season crops.
Chapter 3: Closing the Loop — Apartment Composting
The standard advice for apartment composting is “get a worm bin.” Worm bins work and are the lowest-cost option. But they require: maintaining moisture levels, sorting what goes in, managing population (worms reproduce), and processing the castings. For a gardener who is also juggling work, life, and a balcony garden, a simpler path exists.
The Two Real Options
Bokashi fermentation: A Japanese-origin system using a sealed bucket with a special bran inoculated with effective microorganisms (EM). You layer food scraps with Bokashi bran, compress to remove air, and seal. After 2–4 weeks, you have a fermented pre-compost. For balcony gardeners, the limitation is that Bokashi pre-compost needs to be buried or mixed into a larger compost batch to finish — you can’t add it directly to containers. Solution: mix it into a large bag of potting soil or compost and let it sit for two weeks before use.
Electric countertop composting (Lomi): The Lomi Classic takes food scraps (including meat and dairy, which worm bins and Bokashi handle poorly) and processes them in 4–16 hours into a dry, crumbly soil amendment. It runs on electricity (roughly 1 kWh per cycle) and produces less microbial diversity than true compost, but the output is excellent as a container garden amendment.
For renters with no outdoor space, Lomi is the pragmatic choice. For renters with a balcony and some patience, Bokashi + large storage container = richer output for lower cost.
Using Your Compost in Container Gardens
Container soil loses biology and nutrients faster than in-ground beds because of the higher watering frequency (which leaches nutrients) and the constrained root-ball volume. Compost additions maintain it:
- Top-dress monthly: 1/2-inch layer of finished compost on the surface of active containers. Water it in gently.
- Compost tea: brew Eartheasy’s Compost Tea Kit using your Lomi output or purchased worm castings. Liquid feeding gets nutrients directly to the root zone and introduces microorganisms.
- Refresh at season end: Remove spent plants, dig in a 20% compost layer, let the container rest or replant a cover crop (winter rye, clover) to prevent nutrient depletion.
Chapter 4: Water Management for the Eco-Conscious Balcony Gardener
Rain Barrels for Renters
If you have any roof drainage that terminates near your balcony or patio, a rain barrel is feasible. A 50-gallon rain barrel collecting from a single downspout can offset a significant portion of your container garden’s water needs, depending on your climate.
The key renter challenge is installation: connecting a diverter to a downspout typically requires landlord permission. Options:
- Request it explicitly: Frame it as a sustainability improvement, not a structural change. Most landlords in cities with water rebate programs (LA, Denver, Austin, Phoenix) will say yes — some municipalities offer rebates that flow to the property owner.
- Standalone collection vessels: A simple 55-gallon barrel or IBC tote under a spout doesn’t require any connection hardware — you just position it to catch overflow. Less efficient but requires zero installation.
- Eartheasy’s rain barrel systems are designed for the 2–4 hour setup window. The 50-gallon barrel includes a diverter kit designed to be installable and removable without tools.
See our full guide: Rain Barrels for Renters: What You Can Actually Do in 2026.
Container Garden Watering Efficiency
Standard containers lose water three ways: evaporation from the soil surface, evapotranspiration through leaves, and drainage. You control all three:
- Mulch the surface: 2 inches of compost, wood chip mulch, or coco coir on the container surface cuts surface evaporation by 40–60%. See Eco Mulch Alternatives for Container Gardens.
- Water in the evening or early morning: Midday sun evaporates 30–40% of water before it reaches roots.
- Self-watering containers: As mentioned in Chapter 1, the sub-irrigation design cuts watering frequency by half.
Chapter 5: Building a Pollinator Garden on Your Balcony
“Pollinator garden” sounds like something you need a half-acre for. You don’t. A collection of 6–8 containers with the right plants creates meaningful habitat for bees and butterflies. What matters is plant selection.
Native Plants vs. “Pollinator Friendly” Plants
Garden centers sell a lot of plants labeled “pollinator friendly” that are cultivars bred for showy human-facing characteristics (doubled petals, unusual colors) that have reduced or eliminated pollen and nectar availability. A double-flowered coneflower is beautiful and useless to bees.
For genuine pollinator benefit:
- Stick to species-form natives where possible. The straight species of coneflower (Echinacea purpurea), black-eyed Susan (Rudbeckia hirta), and bee balm (Monarda spp.) feed pollinators; their ornamental cultivars often don’t.
- Herb flowers are often the best bet: Blooming basil, borage, dill, and fennel are highly attractive to bees and require no extra containers (they’re already in your herb garden).
- Avoid pesticide-treated nursery stock: Many commercially available “native” plants are treated with systemic neonicotinoids before sale. Buy from local native plant nurseries, native plant society sales, or grow your own from seed.
For a full plant list and planter arrangement guide, see Native Pollinator Garden on a Balcony or Small Yard (2026).
Chapter 6: Organic Pest Control Without the Spray
The shift most apartment gardeners make after their first pest experience is reaching for neem oil or insecticidal soap and calling it organic. This works. But it’s the beginning, not the end of the strategy.
Prevention first, intervention second. The most effective pest control is growing conditions that don’t favor pests:
- Adequate airflow: Aphids, spider mites, and fungal issues all thrive in stagnant air. Space containers so air circulates between plants. On a south-facing balcony with reflected heat, this is critical.
- Healthy soil biology: Plants grown in biologically active soil (compost-amended, compost-tea-fed) have stronger immune responses. Aphid populations on nutrient-stressed plants are 3–5x larger than on well-fed plants.
- Companion planting: Basil near tomatoes, nasturtiums as aphid trap crops, marigolds for root-knot nematodes. These are real effects, not folklore — documented in multiple university extension studies.
When pests do appear:
- Blast with water first: A strong spray of water from a hose or spray bottle knocks aphids and spider mites off leaves. Repeat every 2–3 days. Effective alone for mild infestations.
- Neem oil: Use cold-pressed neem as a soil drench for fungus gnats; diluted spray for aphids and soft-bodied insects. Neem degrades quickly in sunlight — apply in evening. Note: neem can harm beneficial insects if applied when bees are foraging. Evening application avoids this.
- Diatomaceous earth: For crawling pests (slugs, earwigs, pill bugs). Works physically — damages the exoskeleton. Reapply after rain or heavy watering.
- Insecticidal soap: Kills on contact. No residual. Good for emergency aphid knockdown.
What we avoid: Bacillus thuringiensis (Bt) harms caterpillars indiscriminately — including monarch and swallowtail larvae that you’re attracting with your pollinator plants. Skip Bt in a balcony garden with any native plant component.
For a deeper treatment, see Organic Pest Control Without Chemicals: What Actually Works (2026).
Chapter 7: Mulching Container Gardens
Mulch is underused in container gardening. In-ground gardeners know its value for moisture retention and weed suppression; container gardeners often skip it because containers are “small enough to manage.” But surface evaporation from unprotected container soil is a real water-budget issue, and it’s trivially solved.
Best options for containers:
- Compost top-dressing: Feeds and mulches simultaneously. Ideal if you have your own compost output.
- Coco coir mulch: Lightweight, weed-free, neutral pH. Excellent for balconies where weight matters.
- Fine wood chip or hardwood mulch: Good moisture retention, adds carbon as it breaks down. Use aged/composted hardwood, not fresh (fresh wood chips tie up nitrogen).
- Straw mulch: Works well, but loose on windy balconies. Eartheasy sells certified-organic barley straw mulch.
What to avoid: Rubber mulch (petroleum product, can leach chemicals), decorative rock (heats soil, no organic benefit), peat moss (unsustainable extraction).
See the full guide: Eco Mulch Alternatives for Container Gardens (2026).
Chapter 8: The Tools You Actually Need
The list is shorter than the garden center would like you to believe. For a balcony container garden, you genuinely need:
- A hand trowel — for transplanting and soil work
- A hand fork — for loosening and aerating container soil without disturbing roots
- A watering can — with a rose head for seedlings, a long spout for reaching plants
- Pruning snips / micro-tip scissors — for harvesting herbs, deadheading, and cutting back
- A spray bottle — for pest knockback and foliar feeding
- Plant labels — write in Sharpie on mini-blinds cut into strips. Works better than popsicle sticks.
The EarthHero DeWit Hand Fork and matching hand trowel from DeWit are the longevity choice. Forged steel, ash wood handles, made in the Netherlands. The quality is immediately apparent in the hand and they will genuinely outlast any hardware-store equivalent.
A quality watering can matters more than it sounds. The EarthHero Haws 1.3L Watering Can has a perfectly weighted long spout that allows precise water placement at the base of plants — important for seedlings where sloppy watering causes stem rot.
For a full comparison of sustainable garden tools, see Sustainable Garden Tools Review: EarthHero Picks (2026).
Chapter 9: Beginner Raised Beds
If you have any ground access — a shared yard, a community garden plot, a patio with enough square footage — a raised bed is the single highest-value investment in small-space growing. A 4×8 raised bed at 12-inch depth gives you 32 square feet of growing surface that outproduces an equal area of in-ground garden bed in most urban soils (because you control the soil, not the site).
For beginners, a kit is the right starting point. The alternatives (buying lumber and building from scratch) require tools, skills, and more time than most beginners have in the first season. A good kit arrives with pre-cut pieces and hardware, assembles in 30–60 minutes, and includes enough structural integrity to hold soil without bowing.
What to look for in a raised bed kit:
- Cedar or rot-resistant wood: Cedar and black locust resist rot for 10–20 years without treatment. Avoid treated lumber (the old CCA-treated lumber contained arsenic; newer ACQ treatment is better but still not ideal around food).
- Adequate depth: 6 inches is the minimum; 12 inches is much better for root vegetables and fruiting crops.
- No plastic or metal liner required: A good kit sits directly on native soil, which allows earthworm access from below — a significant benefit for soil biology.
Eartheasy’s raised bed kits and Bootstrap Farmer’s farm tables are the top options in this category. Both use untreated cedar, ship flat, and assemble without power tools.
For a full guide and comparison, see Beginner Raised Bed Kits: What to Buy and How to Set Them Up (2026).
Making It Sustainable: A System That Closes the Loop
The apartment garden that actually works long-term isn’t just a collection of containers. It’s a system:
Inputs → Garden → Outputs → Inputs
Rainwater (from barrel or tap) → containers → food + plant trimmings → Lomi/Bokashi → compost → back into containers.
When you close the loop on water (rain barrel), waste (composting), and nutrients (compost tea, top-dressing), you’ve built a genuinely sustainable small food production system that’s resilient to supply-chain shocks, season to season.
The ecosystem dimension — adding pollinator-attracting plants, avoiding systemic pesticides, using organic pest control — extends the system outward, making your balcony part of an urban habitat network rather than an isolated growing box.
Further Reading in This Cluster
This guide is the starting point. The following deep-dives cover each topic in detail:
- Balcony Container Garden Setup for Apartment Renters (2026)
- Organic Seed Starting with Bootstrap Farmer (2026)
- Apartment Composting: Lomi vs. Bokashi Guide (2026)
- Rain Barrels for Renters: 2026 Guide
- Native Pollinator Garden on a Balcony or Small Yard (2026)
- Organic Pest Control Without Chemicals: What Actually Works (2026)
- Eco Mulch Alternatives for Container Gardens (2026)
- Sustainable Garden Tools Review: EarthHero Picks (2026)
- Beginner Raised Bed Kits: What to Buy and How to Set Them Up (2026)